I’ve been interested in solar power for the last several years and have done some homemade solar generator projects recently. My next project is to improve a portable solar power generator that I have been working on but have put on hold for some time. The ESKY 30amp Solar Charge Controller is the perfect addition to this project.
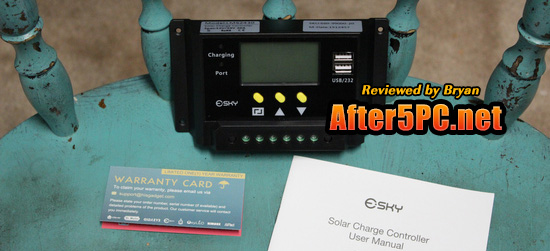

The solar charge controller that I was using for the project had less features and is just a simple model that does the basic things. I bought it cheap on eBay, so I can’t complain much. However, I prefer the ESKY 30A LCD 12V/24V 360W/720W Solar Charge Controller, which I replaced the old one with.
Here’s what the old one looks like for comparison. As you can see, my old solar charge controller is pretty basic; it’s even hard to tell how much battery is left!
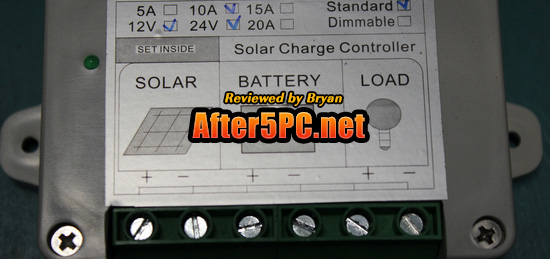

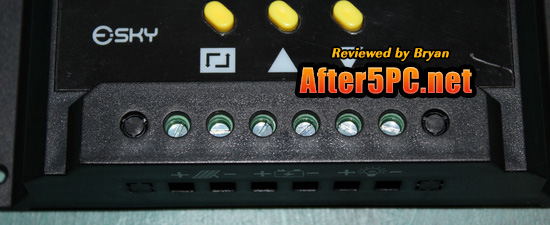
The ESKY LMS 2430 Model Solar Charge Controller has the parts that others in its class do, such as the input connections shown in the photo below, which is located at the bottom of the controller. The first pair on the left is for the solar panel, the middle goes to the battery, and the right side is the load.
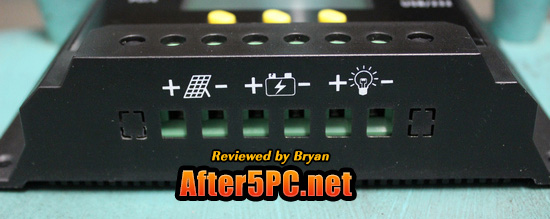

The screws allow you to tighten or loosen the hold on the wires. Make sure the bare portion of your wires touches the metal parts on the input to make a good connection.

SOME FEATURES I HAVE NOTED:
– Large LCD display: The ESKY 30A Solar Charge Controller has an LCD display that is a little over 2 inches in width and over 1 inch size. The old one I replaced had no such LCD features. The only thing it had was little LED that lit up to show you when you’re plugged into the solar panel or charging.
Make sure you peel off the protective covering on the LCD screen…
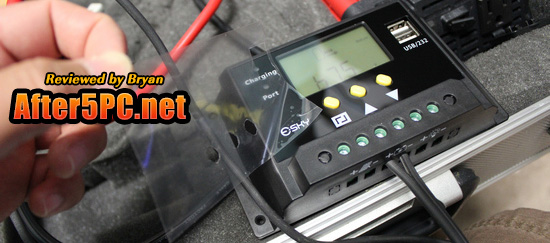

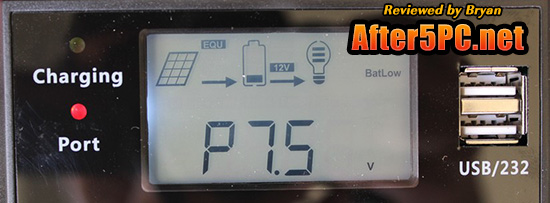
The ESKY 30A Solar Charge Controller is more advanced, with an LCD screen that tells you approximately how much capacity is left with the connected battery. I’ve taken this photo to give you an idea. Looking on just the top part of the LCD screen in this photo, there’s an image of a battery and you can see that the battery level is down on the bottom. On the right is also a text that says “BatLow” to let you know that the battery capacity is currently low. The screen also shows that the charge controller is connected to a 12V battery.
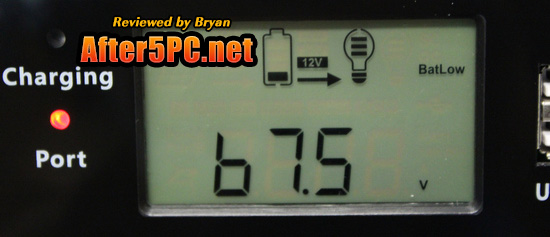

This solar charge controller also boasts other advanced displays so you can be a well-informed user. In the photo above, you can see “b 7.5 v” which shows that the battery voltage is currently 7.5 volts.
The screen can also display the voltage of the connected solar panel. To switch between display options, just press the yellow button on the very left — which is pretty much the main menu button.

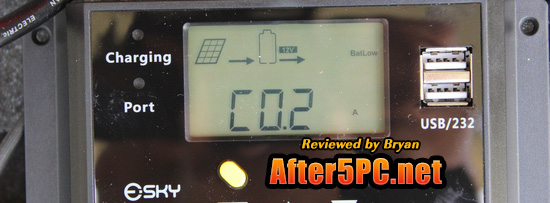
You can also view the charge current. It happened to be a cloudy day at the time of product testing, and you can see “C 0.0 A” on the display shown below.
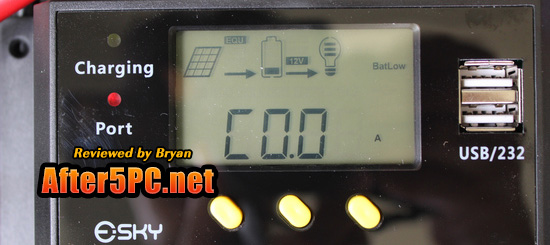

When the sun would come out between the gray clouds, I’d get some power, which you can see in the updated photo. You can see “C 0.2 A” — meaning 0.2 amps is coming in to recharge my battery.

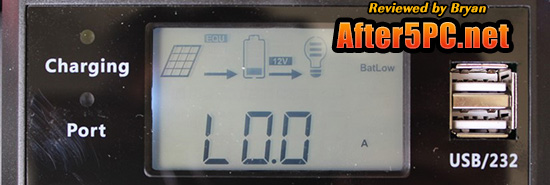
The load output in amps can also be shown. It is displaying as “L 0.00 A” in the photo below because nothing is connected to those inputs at this time. I don’t really use that feature much, as you can tell.

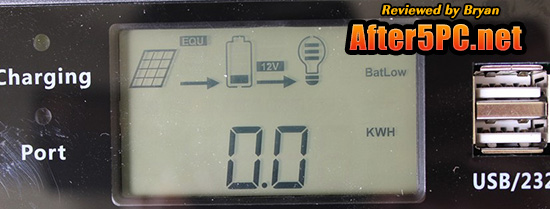
Pressing the menu button can also display the charge energy, which is shown as KWH — in kilowatt hours.

By the way, there are other advanced features which will be explained in the included manual. Now on to the next feature…
– USB ports: This solar charge controller has a built-in USB port for charging small electronic devices that can take a USB, such as a smartphone, tablets, and other smaller devices. The USB charger features 5V and 1Amp. The ESKY 30A Solar Charge Controller comes with 2 USB ports built-in. This is the first solar charge controller I’ve had with USB ports in it. It’s convenient to have this feature. In the past, I’ve had to connect a DC outlet and then put in a DC charger that has USB inputs. I don’t have to any of those extra stuff with this SKY solar charge controller.
I was having issues using the USB ports though. It was turning on and off, so I don’t get consistent charging. I’m not sure if this was due to the current weather during testing, or problems with my battery. I’ll have to check this problem out closely and see if the problem is actually external, or if it’s an issue with the ESKY solar charge controller that I received. (I’ll keep you posted when I find anything new. We’ve had several weeks of cloudy/rainy weather where I am located, so it’s making it a challenge a little bit)
The good news though is that the ESKY 30A Solar Charge Controller comes with a limited 1 year warranty, which is reassuring.
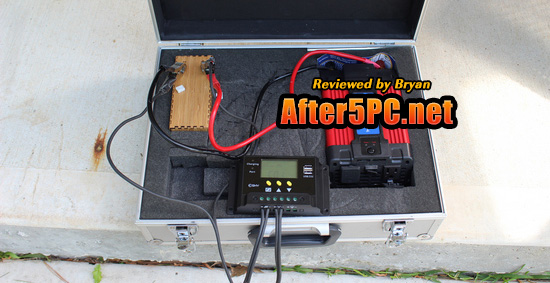
I’m using this charge controller for what I’m hoping will be a long-term, ongoing project, so I hope it can last for quite a while. If you were wondering what my home-made solar power project setup looks like, here it is:

Wondering where to get your own for your solar projects? The ESKY LMS 2430 30A LCD 12V/24V 360W/720W Solar Charge Controller is currently available on Amazon at a 64 percent discount at the time of this writing.


I have one of these controllers & have a ? about its operation. When the panels are charging the battery, the LCD is set to display battery charge current and the PORT light is flashing but the CHARGE light is not illuminated. Can you tell me what the PORT light is for & why the CHARGE light is not lit? Otherwise things work just fine.
Thanks in advance for your reply.
Earl,
If the CHARGE light is not on, it is probably because your battery is still fully charged. The inverter controls it so that it doesn’t over-charge and damage your battery.
It may be best if you contact the seller directly for support. Try the website on the packaging material, which is http://www.eskynow.com
I set up my initial test of the ESKY LMS 2430 and I get no display at all??? No LEDs no LED display? The solar panel I hooked up is only 10v but I expected that it would still light the unit? I also tried inputing 12v DC at the +- connection but still no display at all. Can you tell me why this is not responding?
Thanks, LC
LC,
What do your connections look like? How did you connect or what did you connect to the controller?
Have you ever seen this controller enter the “float” state automatically? The manual states that a slow blinking LED indicates on-going float charge. My controller never slow blinks the LED, even though the “float” icon on the LCD is lit. The voltage just sits at 14.2 and never goes to the float voltage of 13.8V.
I am not sure if my controller ever slow blinks but I will check on that and comment soon. I can say that my controller has performed spectacularly for about 7 months now. I have it set to operate just one LED light and charged by a solar cell and I just set it and forgot it and it just keeps on working automatically. Very please with the product.
I found that the ESky only entered true “float” (13.8V) if I turned off the panel while the battery was fully charged and then turned it back on before it went below 13.2V. The light slow blinked and the voltage went to 13.8. It is implied in the user guide as well. But my AGM battery datasheet calls for 14.2-14.4V until the current goes down to 350 mA, then switch to 13.8V float. The ESky kept the battery at 14.4V which I think is too high, at least for standby applications where it will sit with 14.4V on it for long periods.